Stretching The Limits Of The "Custom HTML" Option....
Without any "techie" ability, you can easily use HTML or JavaScript magic to make your site stand out- just because Weebly doesn't offer it doesn't mean that you shouldn't! Here I'll teach you how to do a bit of the "code stuff" I do around TBH a lot.
Expanding Text
You know how some fancy FAQs have those titles on them and you click the title to expand it and again to collapse it? Isn't that cool? Wish you could do that?
You can do that! Just a little JavaScript magic and you'll be on your way. :)
You can do that! Just a little JavaScript magic and you'll be on your way. :)
The first thing to do is open an HTML editor. I highly recommend this one, it works very well and has never had an error for me.
The next thing to do is copy and paste this code into that editor:
The next thing to do is copy and paste this code into that editor:
<script type="text/javascript">function toggleMe(a){
var e=document.getElementById(a);
var i = document.getElementById(a + '_image');
if(!e)return true;
if(e.style.display=="none"){
e.style.display="block"
i.src = 'YOUR OPEN IMAGE URL';
} else {
e.style.display="none"
i.src = 'YOUR CLOSED IMAGE URL';
}
return false;
}
</script>
<p><a style="cursor:pointer;" onclick="return toggleMe('para1')"><img id="para1_image" src="YOUR CLOSED IMAGE URL" style="border:0;margin-right:5px;vertical-align:middle;" />Question</a></p>
<div id="para1" style="display:none;">
Answer to Question
</div>
That may look hard but it's not- all you have to do is fill in the green parts! I'll break it down for you.
YOUR CLOSED IMAGE URL
This is the little image that appears on the left of the text. This is one is particular is the one that appears by default when the text is collapsed. If the image is taller than the text, (about 10 pixels I would guess) it will appear above it, which may look tacky... Here's a closed arrow that is made to fit just perfect- copy this URL into that space:
http://laimages.s3.amazonaws.com/data/imagemanager/382/Arrow-Right-GreenShade30.png
Otherwise you can just find a small, PNG image (PNG meaning it's "cut out" out transparent around the edges of the focal point) and upload it to tinypic to get the "direct link for layouts" which is what you use in all HTML/CSS/JavaScript/etc etc.
You'll paste this URL in twice- once on top, once in the second half.
YOUR OPEN IMAGE URL
This is just like the other little image except it appears when someone clicks open the text. The same applies for finding your own image, or you can use the one that matches the URL I gave you above:
http://laimages.s3.amazonaws.com/data/imagemanager/382/Arrow-Down-GreenShade30.png
You don't have to make it different, but it's a nice touch. It looks cool if the image changes. ;-)
You only need this code once, unlike the closed image URL.
para1
There are three "paras" in the code; they're all bold and green so you can find them. They all have to have the same number in them.
BUT if you have more than one piece of expanding text on the page, you need to make them different from each other but match to themselves, Let me explain:
Say if I want two expanding titles on a page.
The first one, I would make all three paras read "para1"
In the second one I would make all three paras read "para2".
If I added a third, all three would be "para3" and so on.
If you don't do that right, clicking one title will open any other titles with matching paras.
Question
This is the title people click on to expand the text. You can use HTML to format it if you like- I'll show you in a minute.
Answer
This is the text that expands when people click it. It can be anything- images, videos, text, anything that you can embed can be in there. Once again you may use HTML to "mark up" the text.
In the end, your result is something like this:
Rollover Image Effects
You know how some website have linked pictures for navigation and when you mouse over them the image changes? Like gets grayed out or switches to another image all together? You can do that with HTML!
First, copy and paste this code into that same HTML editor.
<a href="TARGET URL GOES HERE"><img src="URL OF FIRST IMAGE GOES HERE" onmouseover="this.src='URL OF SECOND IMAGE GOES HERE'" onmouseout="this.src='URL OF FIRST IMAGE GOES HERE'" /></a>
And then, as usual, fill in the green parts!
TARGET URL GOES HERE
That's the link that you want people to go to when they click the image.
URL OF FIRST IMAGE GOES HERE
The direct link of the image that appears by default. You paste this in twice, once on the top lone and once on the bottom line.
URL OF SECOND IMAGE GOES HERE
This is the image that appears when someone hovers their mouse over the image. You only need this code once.
And that does it! You have something like these examples that I put on the Layout Navigation (opens in a new window)
If I use one of these, and have to type in HTML mode, how do I format my text?
Well, you can use HTML. It's very simple. Here's the things you can do... the text in the middle of the tags is what you'd have the effect applied to, respectively.
For Bold Text, type <b>bold text</b>
For Italic text, type <i> italic text</i>
For Underline Text, type <u>underline text</u>
For a new line, just type <br> as many time. Every <br> is like hitting the return key once.
For a hyper link, do <a href="URLHERE">LINKTEXT</a> with URLHERE being the link to the page and LINKTEXT being the text you want to make clickable.
For a mail-to link, do <a href="mailto:[email protected]">MAILTOTEXT</a> with the [email protected] being your email and MAILTOTEXT the link text
For an image, do <img src="IMAGEURL"> with IMAGEURL being the direct link of the image
For a linked image, do <a href="YOURLINKHERE"><img src="URLHERE"></a> with YOURLINKHERE the link of the page and URLHERE the image URL.
You can have a list, ordered or un-ordered. Ordered is numbered and un-ordered is bullet-ed. An unordered list starts with the <ul> tag. Each list item starts with the <li> tag. Like this: <ul>
<li>Coffee</li>
<li>Milk</li>
</ul>
Will be
<ol>
<li>Coffee</li>
<li>Milk</li>
</ol>
Is like:
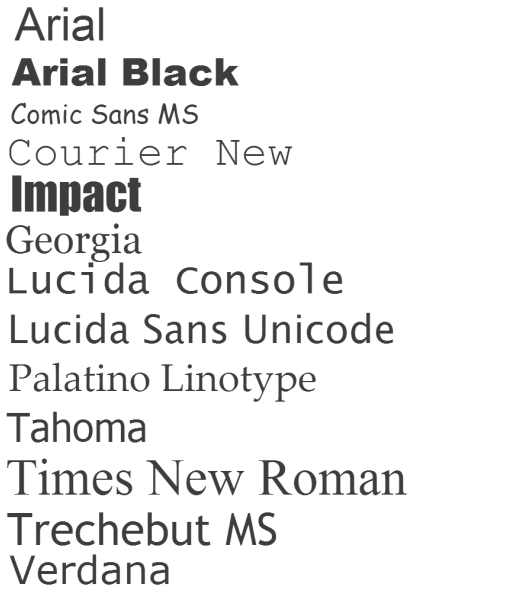
For the font, do this: <font size="2" color="red" face="arial">Formatted Text</font> you can have any generic color like red, blue, green, etc or a hex code color for more detail. You can have any font size, and you can have one of these fonts for your font face, as there are internet safe for HTML:
For Bold Text, type <b>bold text</b>
For Italic text, type <i> italic text</i>
For Underline Text, type <u>underline text</u>
For a new line, just type <br> as many time. Every <br> is like hitting the return key once.
For a hyper link, do <a href="URLHERE">LINKTEXT</a> with URLHERE being the link to the page and LINKTEXT being the text you want to make clickable.
For a mail-to link, do <a href="mailto:[email protected]">MAILTOTEXT</a> with the [email protected] being your email and MAILTOTEXT the link text
For an image, do <img src="IMAGEURL"> with IMAGEURL being the direct link of the image
For a linked image, do <a href="YOURLINKHERE"><img src="URLHERE"></a> with YOURLINKHERE the link of the page and URLHERE the image URL.
You can have a list, ordered or un-ordered. Ordered is numbered and un-ordered is bullet-ed. An unordered list starts with the <ul> tag. Each list item starts with the <li> tag. Like this: <ul>
<li>Coffee</li>
<li>Milk</li>
</ul>
Will be
- Milk
- Coffee
<ol>
<li>Coffee</li>
<li>Milk</li>
</ol>
Is like:
- Milk
- Coffee
For the font, do this: <font size="2" color="red" face="arial">Formatted Text</font> you can have any generic color like red, blue, green, etc or a hex code color for more detail. You can have any font size, and you can have one of these fonts for your font face, as there are internet safe for HTML:
More Soon! This is page isn't near done yet. ;-)
HTML Comment Box is loading comments...
